If you have vmware ESXi or Microsoft Hyper-v, you can expand a disk, from the hypervisor console, very simple. But afterwards the partition the servers is not expand.
It is always a good idea to create a Snapshot/checkpoint before. Just remember, that the disc can’t be expanded in Hyper-v when there are a checkpoint. So first expand the disk in Hyper-v and then create a snapshot.
To do this you first need to rescan the disk for change
echo "1" > /sys/class/block/sda/device/rescanReplace sda with the disk name.
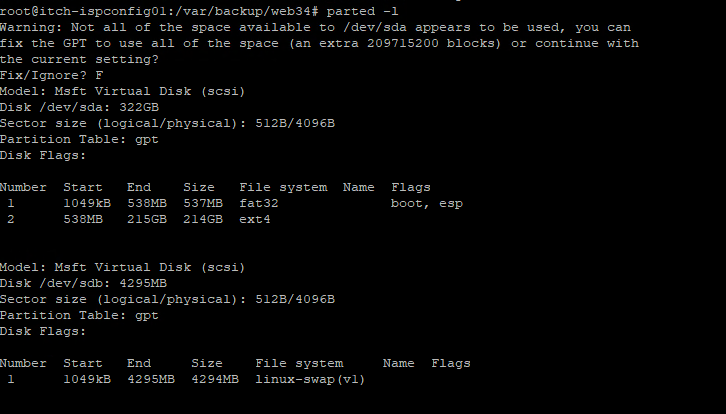
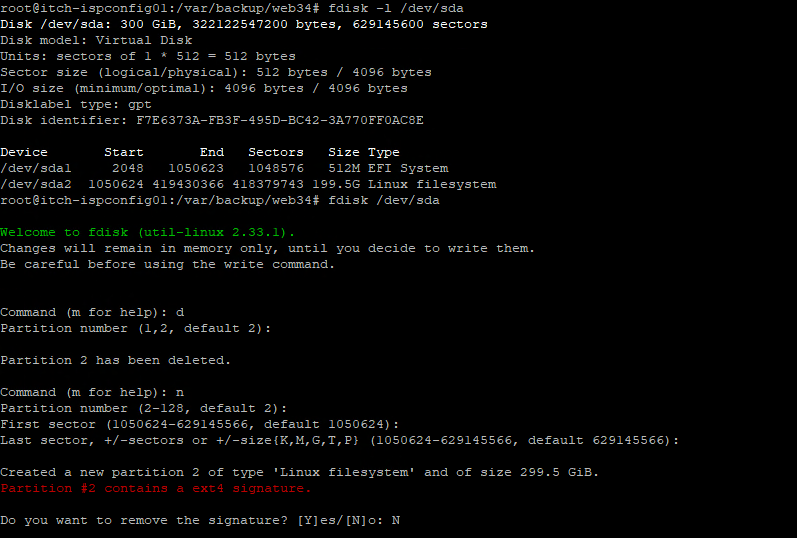
Then you can run fdisk -l /dev/sda, to see the disk information, if you got an error on the top like in the screenshot below

Then you need to repair the disk partition table.
parted -l
After you have check the partition table, you need to delete the old partition, and recreate it
This is done by type fdisk /dev/sda

In the fdisk, you type d to delete, choice the partition, in the example is two. (Beaware that this guide can only be used to expand the last partition on the disk, if you have multiple)
Then you type n to create a new one, and just goes for the default once settings.
In the end type N to not remove the signature.

Then you w to save the settings
Then we just have to resize the ext4 information on the disk, this is done by the command resize2fs

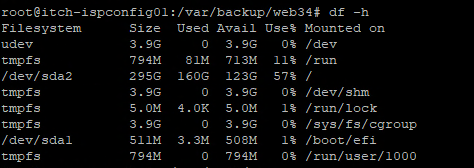
Afterwards you can check that the server have been expand by the command df -h
